
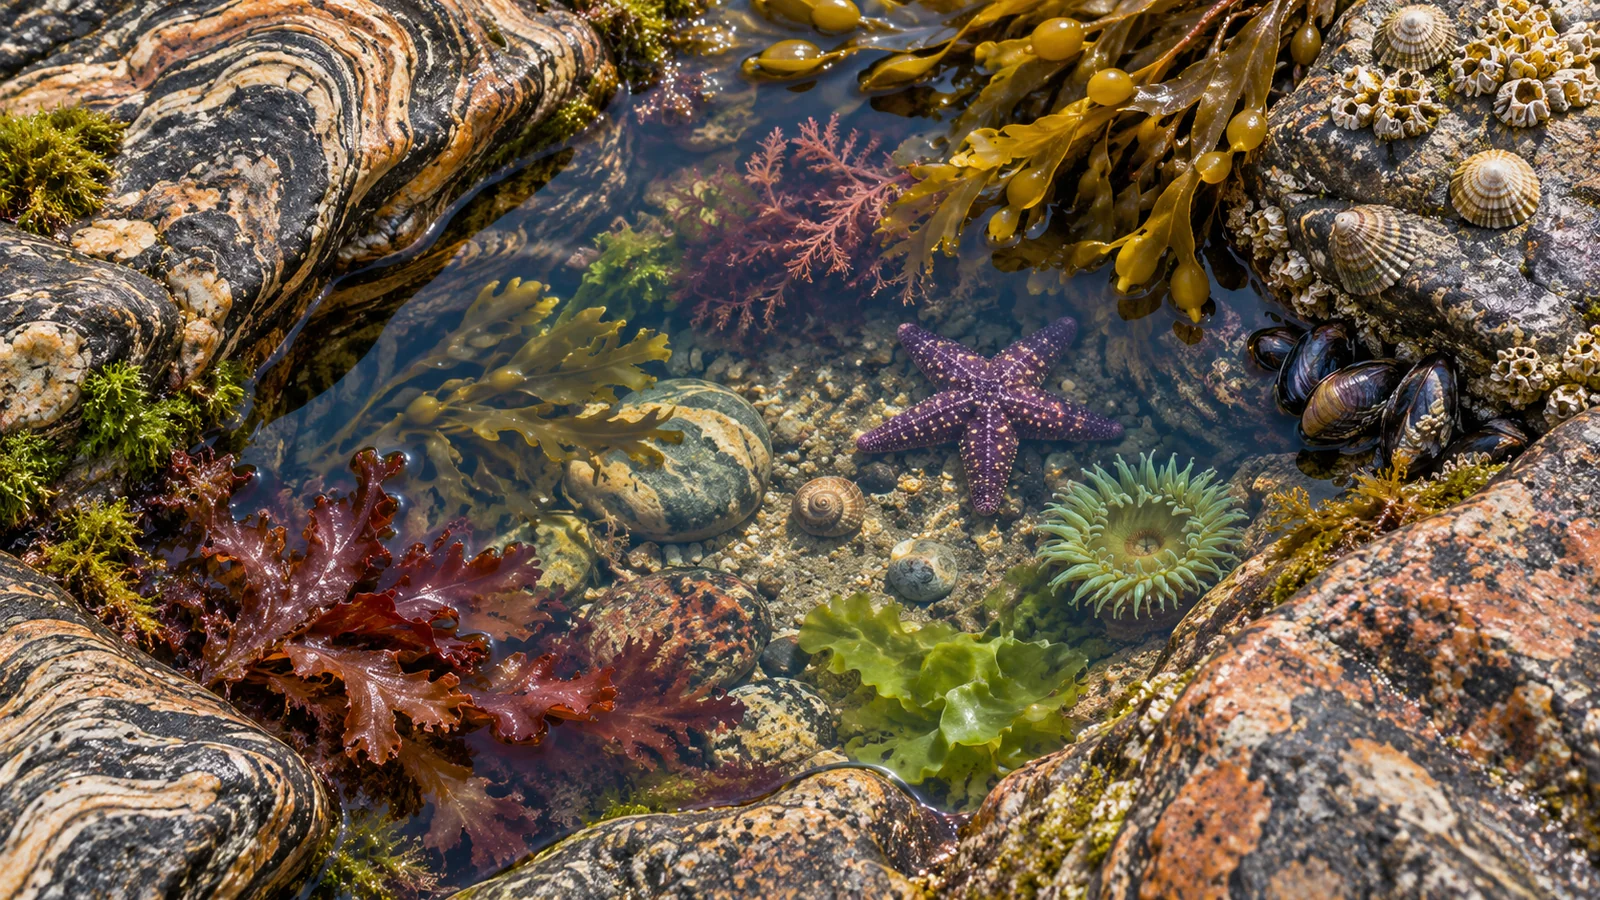
The best way to photograph a tide pool is to work from its edge and leave the animals, shells and rocks where they are. Plan around a local low tide, check park notices and look for a stable place to stand before taking out your camera. Try a wider photograph first so the pool and surrounding shore give the subject context. If a reflection hides a detail, change the camera angle or wait for the water to settle. At Miracle Beach Park, between Campbell River and Courtenay, BC Parks describes tide pools at low tide and asks visitors to observe marine life without touching or removing it. BC Parks Miracle Beach guide
Choose a time when you can leave safely
Look up tide predictions for the shore you plan to visit. Use the station name, date, local time and predicted height together. Campbell River station 08074 is a useful official reference for Campbell River. For another beach, check which station or local guidance is appropriate. A time by itself doesn't tell you how much of a beach will be exposed or how quickly water will return along a particular route. Canadian Hydrographic Service predictions
Arrive while you can see the approach and return clearly. Look for a route that does not require stepping across living surfaces or navigating around water that could close off your way back. Conditions on the beach can differ from the picture you made at home. If wind, surf, slippery rock or rising water makes the approach awkward, stay on the public path and look for a different subject. You can make useful photographs from the upper shore.
A low-tide window can pass quickly when you're concentrating on a small subject. Agree on a time to check the water and look back at the route. If you're with children, set a turnaround point that everyone can recognise. Keep your hands free when crossing uneven ground and take out the camera only after you have stopped. Leave before you would have to hurry back.
Look for subjects you can see without handling them
Watch the pool for a while before making a photograph. Ripples can disguise movement, and a small animal can be hard to distinguish from what surrounds it. Use your eyes to find a feature such as a colour patch, a pattern or a moving appendage. Check whether you can make an image from the position you already have. There is no need to pick up a shell, turn a rock or move seaweed to reveal something below it.
At Miracle Beach Park, BC Parks says to look without touching or removing shells or marine organisms. Treat that as the starting point for your outing. Keep small stones and shell fragments where you find them. Avoid arranging a subject against a more attractive background. If part of an animal is out of view, take a picture of the view you have or leave it to continue undisturbed.
Give living surfaces room. A patch of rock can contain small or well-camouflaged organisms, and vegetation can conceal what is underneath. Look before placing a foot, a bag or a tripod. Choose a stable place that is already suitable for standing. If you need to cross a pool or lean on a living surface to get the shot, choose a wider view instead. Parks Canada's Pacific Rim seashore guide offers further context on how visitors can observe intertidal life with care. Parks Canada seashore guide
Use the surface of the pool as part of the photograph
A pool can reflect the sky, a person standing above it or the edge of the surrounding rock. A slight change in camera angle can change which reflection you see. Try one frame that includes it and another where you can see into the water more clearly. Stay in the same safe position if moving would mean stepping onto a sensitive surface. The changing light may provide the angle you want without moving your feet.
If there is a gentle ripple, watch for a quiet moment. The edges of the subject may become easier to see when the surface smooths. For a moving animal, you may prefer a quicker exposure that records its position more clearly. For a fixed subject, try taking two photographs a few seconds apart. Compare the pattern of light and the clarity of the visible features before deciding which one to keep.
With a phone, tap near the subject and check whether the camera focuses on the animal or the reflected sky. If it struggles, start with a wider view and move the camera angle gently while keeping your balance. A reflection can be a useful part of the scene. Choose whether you want the photograph to show the pool as a place or to show a specific feature beneath the water.
Make a wide frame and a detail frame
A wider photograph can show the shape of the pool and its relationship to the shore. Keep the frame simple. Include one useful edge or a stretch of reflected water so the viewer understands what they are seeing. Check the corners for anything that competes with the subject. When you are happy with the wider view, decide whether you can make a detail photograph without changing where you stand.
For a closer frame, use the zoom or focusing distance you already have. If the camera is too close to focus, back it away or use a wider shot and crop later. Avoid holding the phone or lens so far out over the water that you lose a secure grip. If you can see only one feature, compose around it. A clear image of a shell opening or a pattern can be more useful than a close-up where the camera focused on a different part of the pool.
You may want a record that helps with identification. Keep an original showing context and note where and when you saw it. Use a general name if you are unsure of the species. A photograph from above can leave important features hidden. Do not try to expose those features by moving the animal. Ask a park interpreter or consult a reliable reference once you are off the beach.
Pack lightly enough to keep your balance
A phone or one camera with one lens is enough for an exploratory visit. If you take a tripod, use it only where all the feet can sit securely without harming the habitat or blocking other visitors. You may find a handheld view easier. Use a bag you can close and keep on your body or place in an appropriate dry spot. A loose lens cap can roll into water just as easily as a phone can slip out of a pocket.
Wear footwear suitable for the approach and conditions. BC Parks notes that Miracle Beach includes rocky areas with barnacles and shells and recommends footwear. Keep your camera packed while walking and stop on stable ground to check the image. If someone in your group is concentrating on photography, another person can keep track of the water and time. Everyone should know the route back.
Bring a cloth to keep ordinary moisture or fingerprints off the gear, and check your manufacturer's instructions before cleaning equipment exposed to salt water. If conditions are wet or windy, make shorter photo stops. A small number of clear images is a good result when you can make them without spending too long in one place or drawing a crowd around the pool.
Explore with a group without crowding the edge
Ask everyone to look for a subject from the path or a stable part of the shore before gathering around. Take turns looking from the same position if there is limited room. A child can describe what moved, sketch the shape or make a wide photograph. They can also ask someone else to hold the camera while they watch. The activity can work even when no one gets a close-up.
Give other visitors space to see the pool. If someone points out a subject, let them finish looking before you take their place. Do not turn the pool into a set. Leave the water, stones and organisms as you found them. When you move on, check that you have picked up your own equipment and nothing else.
Try a short field sequence
Start with a photograph of the shore, then make one of the pool from a stable position. Watch the surface for a few breaths before trying a detail. If the subject disappears under a rock or the reflection makes the detail difficult, move on to a texture you can see clearly. A sequence of three photographs can show where you were, what you noticed and what the habitat looked like. It also gives you a way to remember the visit without needing to photograph every animal.
On the way back, look at the shore from a little farther away. You may see how the pool fits between exposed areas and the returning water. Make a final wider frame only if you can do it from the route you already planned. Save the editing and identification questions for later, when you can check the photographs in good light.
Check what the picture leaves out
When reviewing the photograph, compare the detail with your wider view. A tight frame may show a small animal clearly but leave its scale or habitat unclear. The wider view can also show how much of the pool remained underwater. Keep a note if you can estimate its size without placing anything in the pool. Avoid making claims about what the animal was doing if the photo only captures one moment. A caption can say where you were standing, what you noticed and whether the identification is uncertain. You can also share two frames, one that shows the pool and another that makes the visible feature easier to see.
Frequently asked questions
Do I need a macro lens?
A macro lens can help if you already have a stable position and enough room to work, but a phone or standard zoom can show the pool and some visible details. Use the camera you can hold securely and put away easily. Compose wider if a close image would require you to reach or step into the pool.
Can I move a shell for a clearer view?
Leave shells and organisms where you find them. At Miracle Beach, BC Parks asks visitors to look without touching or taking them. Adjust the camera position from stable ground or choose another subject. The shape of the setting can be part of the picture.
Is any low tide suitable?
Check the predicted height, timing and local conditions, then assess what you can reach safely from the public shore. A lower number can expose more habitat, but it does not make every approach appropriate. Leave time to return before conditions change.
Can I visit a tide pool and take a wildlife boat trip in one day?
It can work if the tide, park access and tour check-in leave room for both. Keep one part flexible. A tide pool is a short shore-based study, while a boat trip introduces a different part of the coastal ecosystem. Check the departure time before committing to both on the same day. Eagle Eye Campbell River wildlife tour
Check the tide and park advice, choose a place to stand and give yourself time to observe before taking a photograph. A clear record of a small detail is enough for a successful visit.